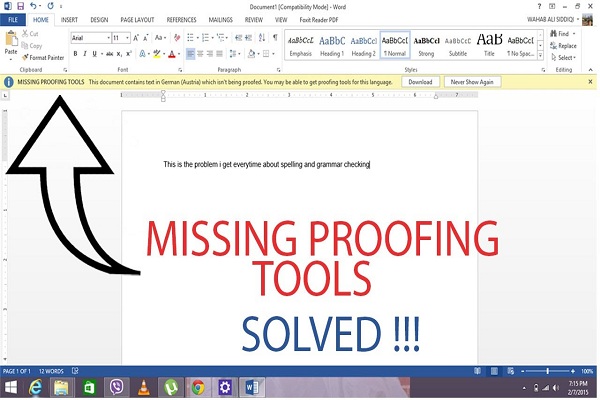
How to Fix Missing Proofing Tools Error in MS Word on Windows 10?
The “Missing Proofing
Tools” error sometimes occurs in Microsoft Word due to faulty files, incorrect
language, or incorrect MS Office installation. It can be fixed by repairing
your Word document or changing the language preferences settings.
Missing Proofing Tools
errors arise while editing a Word document. In case you are among those who are
facing these errors, then read on and follow the solutions mentioned below.
Here is how you can fix this error on Windows 10.
Changing
Proofing Language Manually
Here is how to change
proofing language manually on your Windows 10:
- First of all, open the MS Word
on your device’s screen and then launch the particular document having the
error.
- Hit the Ctrl and A tab to
select the entire text of your document.
- After that, launch the Review
tab directly from the toolbar section.
- Hit the pull-drop menu of
language.
- Go to the Language section and
then select the option Set Proofing Language.
- Now, select your desired
language from the new language section.
- Hit the option “Set as Default”
if you like to set the language as the default one for all your documents.
- Press the OK button to proceed.
- Save the changes you have made.
Installing
Proofing Tools 2016
Here are the steps for
installing Proofing Tools 2016 on your device:
- First and foremost, go to
microsoft.com and then open the MS Office Proofing Tools 2016.
- Choose the language from the
download center page.
- Now, hit the Download tab to
proceed.
- Choose the version 32-bit or
64-bit for proofing tools based on your OS edition.
- Hit the Next tab there.
- Now, run the installer and then
follow on-screen directions to install your proofing tools for Office
2016.
- Note: It is necessary to
install a 32-bit proofing tool for a 32-bit Windows device and a 64-bit
for a 64-bit device.
- Once you have successfully
installed the proofing tools 2016, re-launch Microsoft Office app on your
device and then check if the issue is resolved or not.
Fixing
Word Installation
Here is how to fix MS
Word installation issues to resolve Missing Proofing Tools:
- At the start, hit two different
keys simultaneously: Window and R to launch the Run dialog box.
- After that, enter “Control” and
then hit the OK tab.
- Go to the Control Panel and
then press the Programs tab.
- Then, hit the Programs and
Features option.
- Now, choose the option MS Word
from the listing of installed apps.
- Hit the Change option and then
press the Yes button if prompted by the UAC window.
- Choose the Quick Repair tab and
then tap on Repair again if the confirmation prompt appears.
- Wait for the repairing process
to finish. In case the error persists, perform the Online Repair.
- Hit the Repair option to
proceed. The process might take longer, but it troubleshoots all issues
with the installation of your MS Office.
- Once the repair procedure is
complete, reboot the MS Office and ensure that the proofing tools error is
completely fixed.
David Maxwell is a creative person who has
been writing blogs and articles about cybersecurity. He writes about the latest
updates regarding mcafee.com/activate and how it can improve the work
experience of users. His articles have been published in many popular
e-magazines, blogs and websites.
Source : How to Fix Missing Proofing Tools Error in MS Word on Windows 10?


Comments
Post a Comment